Dimensional Metrology Systems facilitate critical measurement of medical parts, but the selection of a metrology system can be challenging. A wide range of options exist for hardware and software which can be combined to create different types of systems, sometimes at widely different costs. The systems also vary in complexity, ranging from easy-to-learn manual optical comparators to fully programmable multi-sensor CNC Systems.
Many of the higher-end products are electro-mechanical metrology systems which may combine optics with precision mechanical motion, linear encoders and digital image and data processing. These systems include optical comparators, vision (or video) metrology systems and a new product category of digital comparators. A digital comparator is a vision metrology system that functions like an optical comparator but utilizes a DXF “digital overlay” instead of traditional overlays.
Depending on the application requirements, each metrology solution has its advantages. QC demands for medical parts are extremely high and warrant a close look at the most advanced metrology solutions.
Medical parts inspection demands are increasing with tighter accuracies, traceability and the need for 100% inspection. Many manufacturers have been accustomed to using go-no-go methods of gaging, such as the use of overlays in optical measuring or functional fit gages. However, there are shortcomings associated with these methods.
With overlays, operator subjectivity is a significant factor. There are fine nuances to contend with, such as on-screen placement, imprecise or worn Mylar’s, magnification, complex part shapes and especially the lack of detailed, variable data. Such issues force an inspector into the realm of judgment, which varies from operator-to-operator. Fatigue and data accuracy also comes into play.

Functional fit gages also present their share of challenges. The gage development process is usually lengthy and expensive, with limited flexibility when parts change. And again, no variable data is attainable in the inspection process.
Moreover, both overlays and functional fit gages provide no opportunity for a comprehensive audit trail and traceability process, which is paramount in medical manufacturing.
Ultimately, the goal in any good inspection program should be to attain maximum gage repeatability and reproducibility (GR&R) and in the process, provide comprehensive, data for statistical process control (SPC) and traceability.
Reliable GR&R is possible with today’s non-contact video and multi-sensor systems and their advanced software. Current display readout and software measuring technology such as Metlogix M3 provides full qualitative/ quantitative profile analysis functions where an inspector can compare a part profile against a nominal CAD model and obtain an actual graphic representation of any deviation from the CAD file.
The system automatically finds and tracks the edge, continuously comparing it to a 2D profile, and superimposes the edge to a CAD model. In this scenario, an operator quickly, easily and automatically collects tremendous amounts of data that are all archived and documented with date, time, lot number, job number and so on, removing operator error from the equation. Not only can 100% inspection be realized, but inspection speed and throughput can also be dramatically increased due to automated system measurement routines and depending on the application, palletized multi-part fixture inspection tables. Indeed, today’s technology offers far more than error prone traditional methods.
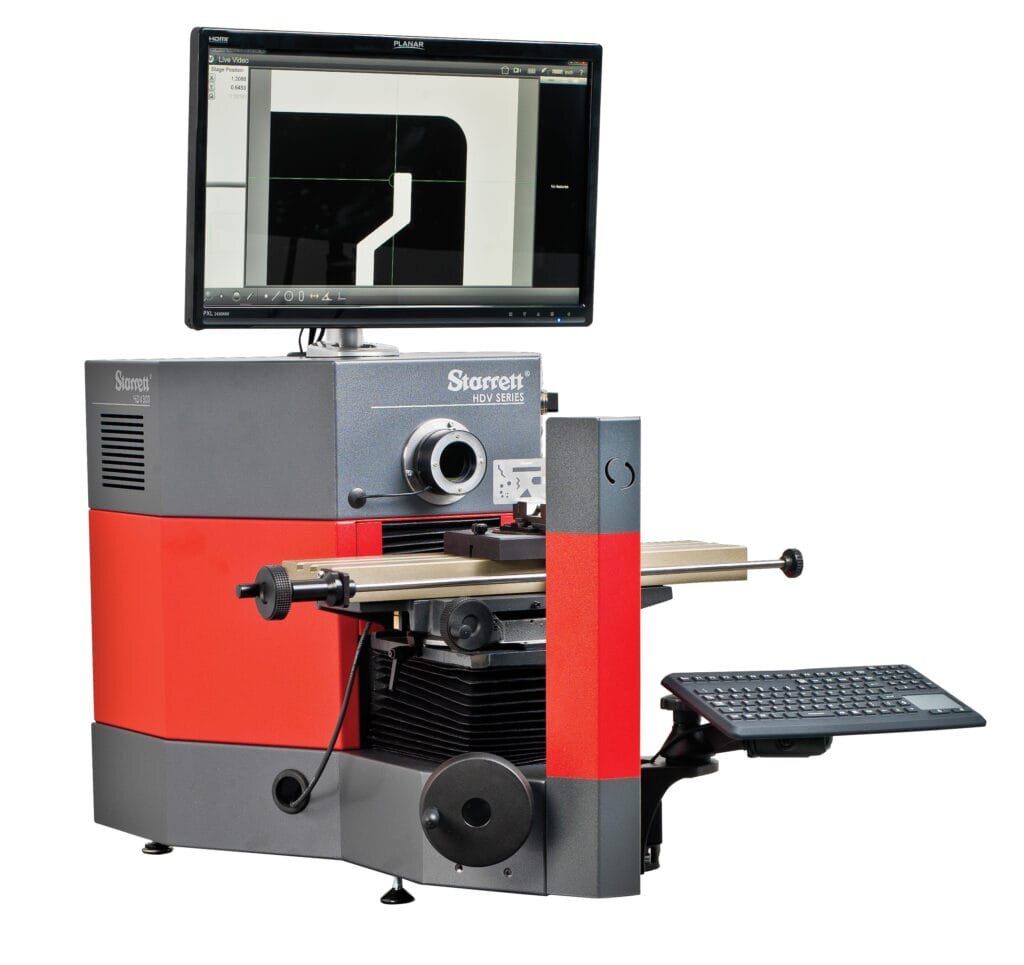
An example of a suitable system is the Starrett HDV 300, this is a horizontal Digital Video Comparator that combines the best features of a horizontal optical comparator and a vision metrology system. The HDV is configured like a traditional horizontal comparator. The Workstage is the same as the Starrett field-proven comparators. The heart of the HDV system centers on a uniquely patented designed interchangeable lens mounting system coupled to a hi-resolution 5 mega-pixel digital video camera. The system is available with a choice of seven telecentric lenses for micron-level resolution and optical distortion as low as 0.001% for accurate field-of-view (FOV) measurements. With MetLogix™ M3 software, DXF CAD files can be imported and 2D Go/No-Go digital overlays can be developed directly from the CAD files. Video edge detection (VED) allows real-time interaction of the imported file with the video image of the part being inspected. Productivity, speed and accuracy are all enhanced. Systems are available manually or CNC control.
www.optimaxonline.com


