The Prototal Group is Europe’s largest provider of 3D printing, injection moulding and vacuum casting. With 10 sites across Europe including Prototal UK (formerly 3tamp) based in Newbury and since 2022, 1zu1 Prototypen GmbH & Co KG, based in Dornbirn, Austria. Today, 1zu1 has 160 employees, and produces prototypes, small series and series parts for customers from all over the world and for every conceivable industry. In manufacturing, 1zu1 uses the most important 3D printing processes such as laser sintering and stereolithography. When developing new components for its customers, 1zu1 likes to push the limits of what is possible in terms of complexity and precision. Metrology plays an extremely important role in measuring and checking the finest details and tightest form and position tolerances.
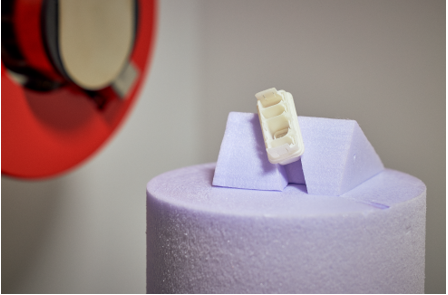
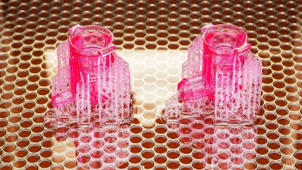
CT measurement of a miniaturized automotive connector. (Source: Darko Tadorovic)
1zu1 has been using optical measurement solutions for over ten years and produces several hundred measurement reports per year. “We know the limits of optical measurement technology very well,” explains Managing Director Wolfgang Humml. “Against the background that the components we produce are becoming increasingly complex and smaller, it was clear to us that we wanted to take the next, innovative step in measurement technology and that the comparisons of 3D measurement results to 3D data sets had to become better and more accurate.” Several criteria were important in the search for a new measurement solution.
Industrial computed tomography versus optical metrology
The focus was on the accuracy of the measurement result over the entire 3D part and not just for the area that can be captured with optical measurement technology. Here, industrial computed tomography has clear advantages. Compared to tactile or optical measuring machines, the computer tomograph (CT) can also measure internal features with high precision in a non-destructive manner. Optical metrology clearly has its limits, especially for measuring transparent components as well as parts with high-gloss mirror surfaces. Measurement without prior treatment with a laser scanning antireflection spray is not possible for such parts. In addition, the required measurement accuracy cannot be achieved with a spray application. Another major advantage of industrial computed tomography is the speed of the scans and evaluation. Thousands of measuring points can be measured within seconds. In addition, the performance of so-called pallet scans (several components in one scan) offers a shortening of process cycles and an increase in economic efficiency.
After an extensive selection process, 1zu1 chose the exaCT L CT system (150kV) from WENZEL Metrology. “Critical in our decision was the guaranteed measurement uncertainty of +/- 5 µm, the convincing CT measurement of our five benchmark problem parts and the impressive surface imaging accuracy without software smoothing,” Humml elaborates. “We were so impressed with the measurement results that we were happy to order the first machine built with this configuration, and already have the system up and running at our facility. The scan times of the system are impressively fast, so we were able to do about 120 scans in normal working hours in the first three weeks of operation.” The high efficiency of the CT solution enables faster development times, saving time and costs for the end customer as well.
High scanning volume with small footprint
In addition, WENZEL’s CT solution has the smallest footprint in its class at 150kV and also offers a scan volume of 400 mm in height and 235 mm in diameter. “The desire for the largest possible measuring volume with a comparatively small machine design was another important requirement criterion,” emphasizes Humml. In addition to the small footprint and large scan volume, the exaCT L offers another major advantage – transport and assembly did not require modification of doors or aisles, which ensured fast and smooth installation without additional effort. The exaCT L is also best in class when it comes to system weight, at only 2,650kg, which again, allows flexibility in set-up locations.
The exaCT L is the latest development in WENZEL’s extensive exaCT series. The system won Frost & Sullivan’s ‘Global New Product Innovation Award 2020’ based on a worldwide market analysis for industrial computed tomography. “The exaCT L has superior X-ray performance combined with a fast detector, allowing it to quickly measure objects and defects,” said Mariano Kimbara, senior industry analyst at Frost & Sullivan. “WENZEL has taken an important step into the market with an intuitive user interface that uses intelligent software to automate all measurement parameters, providing robust customer value.” Three independent travel axes provide great flexibility and enable high speeds and short measurement and inspection times.
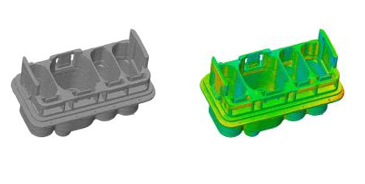
: Color comparison of the scanned component. Red indicates a deviation of +0.2 millimeters and blue of -0.2 millimeters. (Source: Darko Tadorovic)
From additive manufacturing to machining
Driven by high quality awareness, 1zu1 has to solve numerous measuring and testing tasks for its customers: Whether dimensional evaluations, compensation of shrinkage and warpage, testing for inclusions and impurities, geometric tests, assembly analyses (Multiscan) and process monitoring (measurement series), the measurement and test reports are always presented in a customer-friendly and comprehensible manner.
Industrial computed tomography and additive manufacturing are two comparatively young technologies that can be excellently combined. While “additive manufacturing” allows new structures, the quality assurance of these novel products is readily delivered by CT. Based on these results, correction data is generated, which can decisively improve both the dimensional accuracy and the mechanical stability of 3D-printed parts. Complex shapes created by 3D printing often pose difficulties for conventional measuring systems. Only CT technology enables non-destructive material analysis and dimensional accuracy testing.
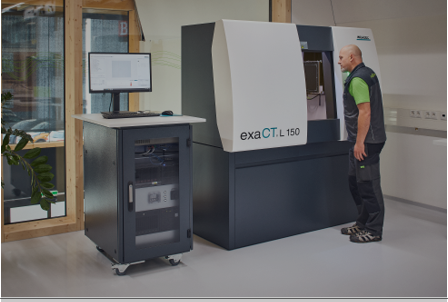
: With computed tomography for rapid diagnosis. The new exaCT L system in the metrology department of 1zu1 Prototypen GmbH & Co KG in Dornbirn, Vorarlberg. (Source: Darko Tadorovic)
Advantages of industrial computed tomography
- Finest details and tightest form and position tolerances can be measured and inspected.
- High accuracy of the measurement result over the entire 3D component
- High scanning and evaluation speed
- Pallet scans shorten process cycles and increase efficiency.
- Internal structures can be captured.
- Non-destructive material analysis and dimensional inspection
- High scan volume with small footprint
- Limitations of optical and tactile measuring systems do not apply to CT
- Measurement of transparent and high-gloss surfaces without spray application
Conclusion
The Wenzel exaCT L industrial computer tomograph is a universally applicable testing and measuring device for optimizing components and manufacturing processes. The measuring solution works highly efficiently with significant added value for the customer. Faster development times save time and costs. If an analysis or inspection of internal structures is necessary, this can be carried out without destroying the component. This also leads to significantly faster scan times and lower costs. With just one scan, metrological evaluations and analyses can be performed from the generated data. The reliable measurement results are documented in a customer-friendly and comprehensible manner. – Here’s a thought on the subject of safety: even with less complex consumer goods sold in large quantities, failures can occur with equally expensive consequences for the recall and the company’s reputation. Archiving the measurement results allows for re-analysis in the event of a failure to allow for quick correction or to refute a potential lawsuit.
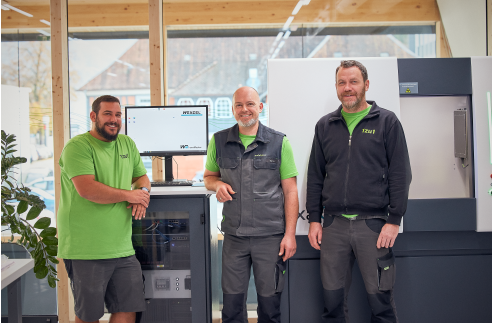
The 1zu1 measurement technology team. from left to right: Andre Heinek, Marco Hermann, Josef Maierhofer (Source: Darko Tadorovic)

